WebAPI: Restful CRUD Operations in WebAPI Using ADO.NET Objects and SQL Server 2008

The Web API is a platform to develop HTTP / HTTPS based services that can be used by native applications like on smart phones, tablets and any browsers. The WebAPI is a core part of ASP.NET and provides ways to create Restful services and can be used by any applications that can understand HTTP communications.There were many example to perform CRUD using Entity Framework , so I though to implement with ADo.Net objects with SQL Server 2008.
Implementation of Restful operations using ASP.NET Web API
Let's create a sample application and do this step-by-step.
Step 1
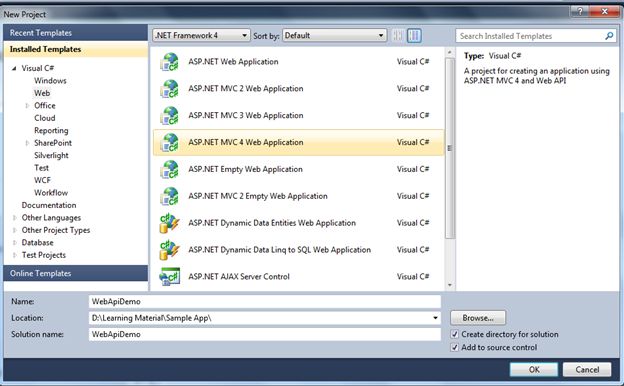
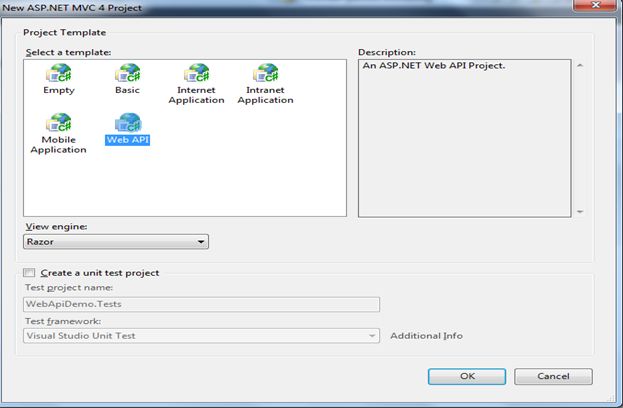
Let's first create a sample web application and using "ASP.NET MVC 4 Web Application" and name it as you choose. I used "WebApiDemo" as shown in the following image:
Step 2
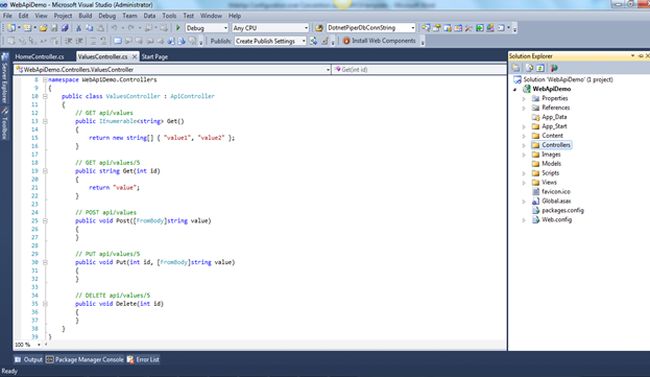
Click OK and choose the Web API command from the templates shown in the wizard window.
Step 3
You will find the application structure as shown below at first sight.
Step 4
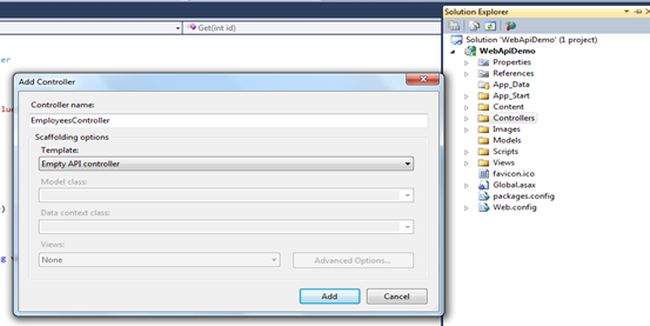
Right-click the Controllers folder in the Solution Explorer of Visual Studio. Select "Add" ➤ "Controller" and provide a name of EmployeesController for the controller. Leave the option "Empty API Controller" selected in the Template dropdown and click "Add", as shown in the figure below. Notice that the generated controller class inherits from ApiController, a class that is part of the ASP.NET Web API framework.
Step 5
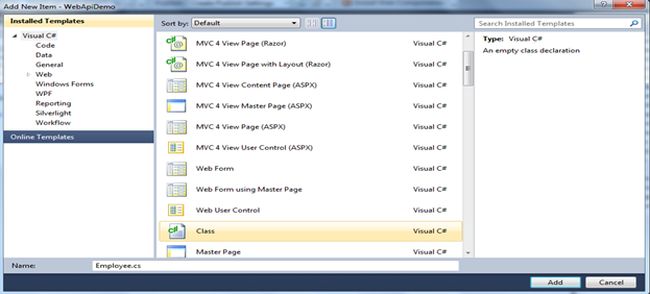
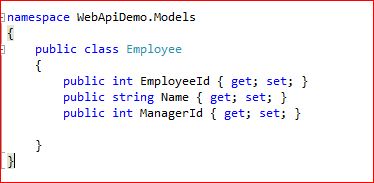
Right-click the Models folder in the Solution Explorer of Visual Studio. Select "Add" ➤ "Class" to add a new class with a name of Employee.
After creating the Employee class, kindly add the following code into this class.
Code Segment
  1: public class Employee
  2: {
  3:    public int EmployeeId { get; set; }
  4:    public string Name { get; set; }
  5:    public int ManagerId { get; set; }
  6: }
  7:
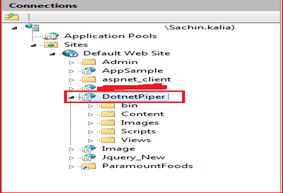
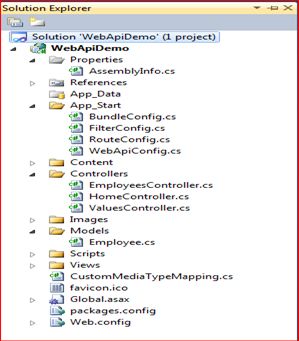
This is the complete structure of the solution as depicted in the image below:
Now we'll open the EmployeeController and implement the Get-Post-Delete-Update methods one by one.
Execution of Get Method of WebAPI:
Now open the EmployeeController and paste the following code into that as the Get WebAPI method:
  1: [HttpGet]
  2:  [ActionName("GetEmployeeByID")]
  3: public Employee Get(int id)
  4:  {
  5: //return listEmp.First(e => e.ID == id);
  6:      SqlDataReader reader = null;
  7:      SqlConnection myConnection = new SqlConnection();
  8:      myConnection.ConnectionString = @"Server=.\SQLSERVER2008R2;Database=DBCompany;User ID=sa;Password=xyz@1234;";
  9:
 10:      SqlCommand sqlCmd = new SqlCommand();
 11:      sqlCmd.CommandType = CommandType.Text;
 12:      sqlCmd.CommandText = "Select * from tblEmployee where EmployeeId=" + id + "";
 13:      sqlCmd.Connection = myConnection;
 14:      myConnection.Open();
 15:      reader = sqlCmd.ExecuteReader();
 16:      Employee emp = null;
 17: while (reader.Read())
 18:      {
 19:          emp = new Employee();
 20:          emp.EmployeeId = Convert.ToInt32(reader.GetValue(0));
 21:          emp.Name = reader.GetValue(1).ToString();
 22:          emp.ManagerId = Convert.ToInt32(reader.GetValue(2));
 23:      }
 24: return emp;
 25:      myConnection.Close();
 26:  }
 27:
In the same way we will implement the Post and Delete employee. Now I have run the application and see the results. Press F5, it will show you the following screen:

The preceding Blue screen shows that the Web API is up and running.
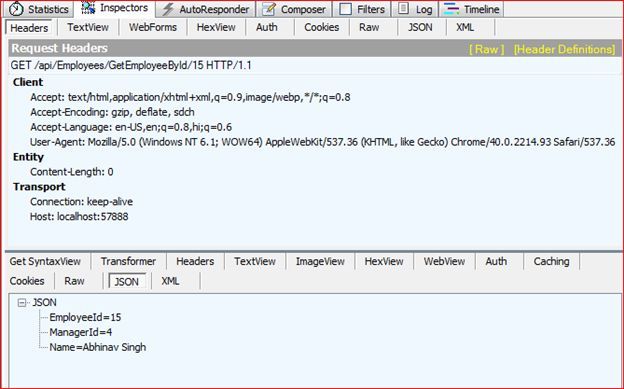
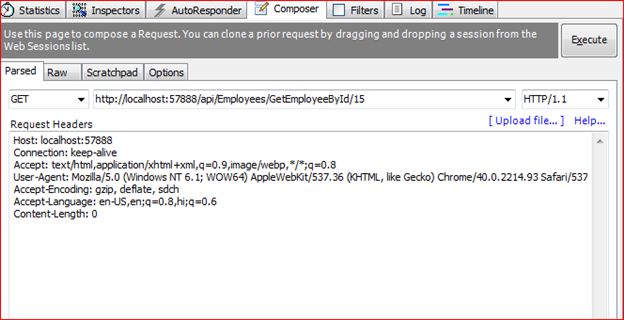
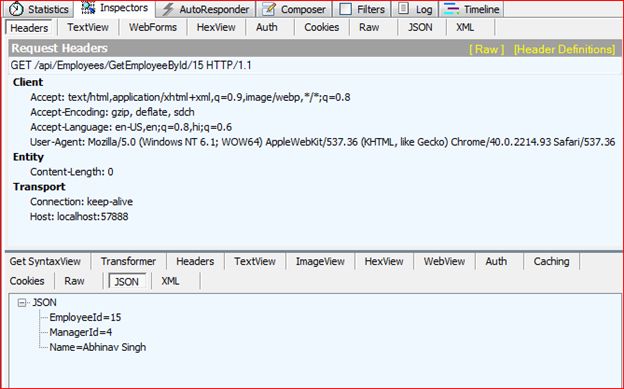
I've used Fiddler to trace the requests, so I will open Fiddler to execute the following link to retrieve the information of the EmployeeID “15”. http://localhost:57888/api/Employees/GetEmployeeById/15.
Execution of AddEmployee (POST) Method of WebAPI
Now open the EmployeeController and paste the following code into that as the Post WebAPI method. The code is shown below:
  1: [HttpPost]
  2: public void AddEmployee(Employee employee)
  3: {
  4: //int maxId = listEmp.Max(e => e.ID);
  5: //employee.ID = maxId + 1;
  6: //listEmp.Add(employee);
  7:
  8:
  9:     SqlConnection myConnection = new SqlConnection();
 10:     myConnection.ConnectionString = @"Server=.\SQLSERVER2008R2;Database=DBCompany;User ID=sa;Password=xyz@1234;";
 11: //SqlCommand sqlCmd = new SqlCommand("INSERT INTO tblEmployee (EmployeeId,Name,ManagerId) Values (@EmployeeId,@Name,@ManagerId)", myConnection);
 12:     SqlCommand sqlCmd = new SqlCommand();
 13:     sqlCmd.CommandType = CommandType.Text;
 14:     sqlCmd.CommandText = "INSERT INTO tblEmployee (EmployeeId,Name,ManagerId) Values (@EmployeeId,@Name,@ManagerId)";
 15:     sqlCmd.Connection = myConnection;
 16:
 17:
 18:     sqlCmd.Parameters.AddWithValue("@EmployeeId", employee.EmployeeId);
 19:     sqlCmd.Parameters.AddWithValue("@Name", employee.Name);
 20:     sqlCmd.Parameters.AddWithValue("@ManagerId", employee.ManagerId);
 21:     myConnection.Open();
 22: int rowInserted = sqlCmd.ExecuteNonQuery();
 23:     myConnection.Close();
 24: }
 25:
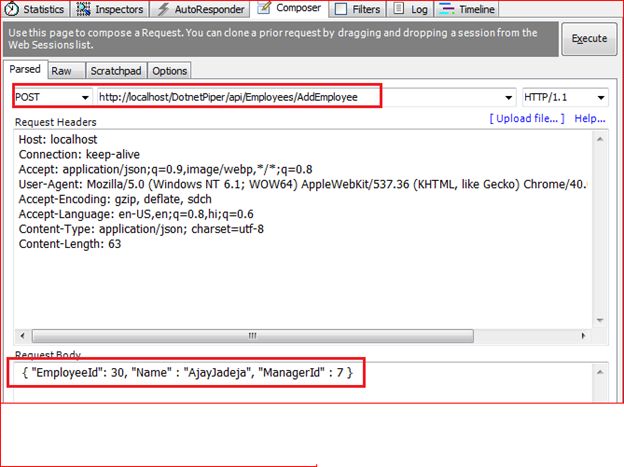
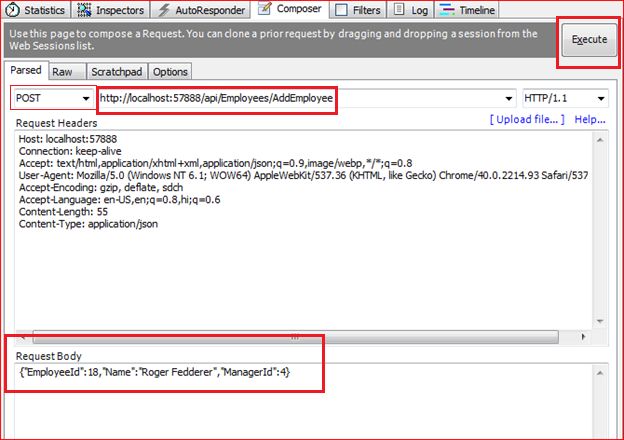
Since the WebAPI is already in running mode, I'll execute the following link to add an employee to the database.http://localhost:57888/api/Employees/AddEmployee and will pass the given the following parameters
{"EmployeeId":20,"Name":"Mike Prior","ManagerId":6}.
Please open the database to confirm whether or not the user “Roger” has been added to the data base. Kindly look at the image shown below:

We are almost done with the execution of the Post method.
Execution of DeleteEmployeeById (Delete) Method of WebAPI
Now open the EmployeeController again and paste the following code into that as the Delete WebAPI method:
  1: [ActionName("DeleteEmployee")]
  2: public void DeleteEmployeeByID(int id)
  3: {
  4:     SqlConnection myConnection = new SqlConnection();
  5:     myConnection.ConnectionString = @"Server=.\SQLSERVER2008R2;Database=DBCompany;User ID=sa;Password=xyz@1234;";
  6:
  7:     SqlCommand sqlCmd = new SqlCommand();
  8:     sqlCmd.CommandType = CommandType.Text;
  9:     sqlCmd.CommandText = "delete from tblEmployee where EmployeeId=" + id + "";
 10:     sqlCmd.Connection = myConnection;
 11:     myConnection.Open();
 12: int rowDeleted = sqlCmd.ExecuteNonQuery();
 13:     myConnection.Close();
 14: }
 15:
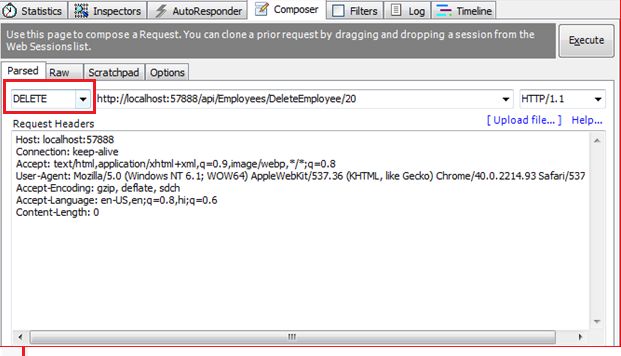
Since the WebAPI is already in running mode, I'll execute the following link to delete an employee by the employee id database. http://localhost:57888/api/Employees/DeleteEmployee/20.
Please open the database to confirm that EmployeeID “20” has been deleted. Kindly look at the image shown below:

Note: I have intentionally left the implementation of the Update method so that the end user can have hands-on on this. I'll also add database backup for user help.
Go through with these detailed links to learn more about the WebAPI.
Detailed links to learn more about the
WebAPI.
Points to consider:
- You should have a little knowledge of the WebAPI.
- You should have a knowledge of the Fiddler tool to execute the functionality.
- There is a need for SQL Server also.
I hope it will help you somewhere down the line.You can download the code from here : Restful CRUD Operations in WebAPI Using ADO.NET Objects and SQL Server
Keep coding and Smile