Demystify Web API Versioning

Since technology is evolving every day, you may have the opportunity to upgrade your existing business needs and this tutorial is about WebApi Versioning using Routing. Once you have published a successful API, the client/consumers will start depending on it, but change is required as business grows. Requirements are being changed every day and here the idea occurred to me to create a new API without tampering with an existing one. There are various ways to do this, like URL, Custom header, Query String and Accept Header.
Web API Versioning using URI:
First, I will cover WebApi versioning using an URL in this section before proceeding. I’d like to share one of the possible situations when you may need this. So let’s dive into it in a practical way.
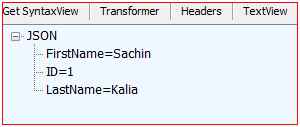
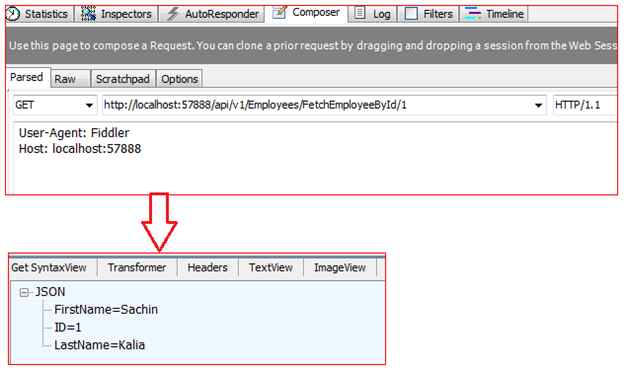
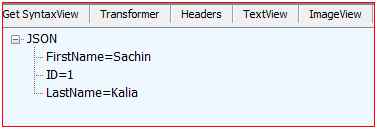
You might have a situation in which you already have a running WebApi hosted on a server and plenty of end users are getting its benefits. For an example, here the current API is returning a response in JSON format as shown below:
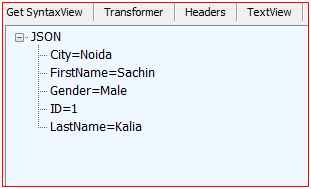
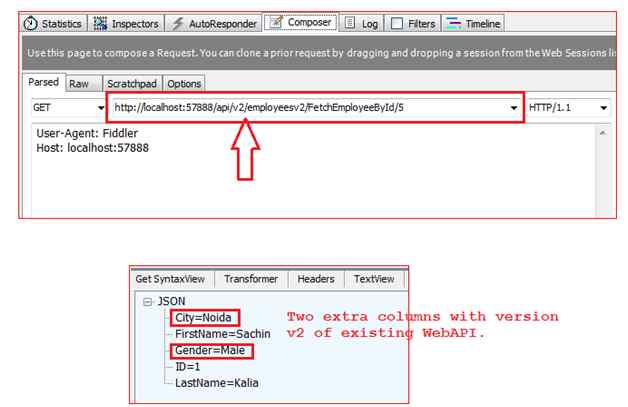
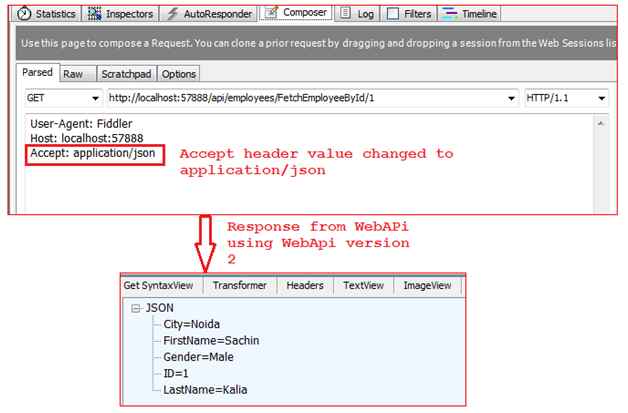
Down the line, the customer may desire to have a few more things without messing with the existing one. After considering a new requirement, the client needs a few more fields from the same API to maintain their policies at the business level, so now we can consider a new version of the API with a few more fields like City and Gender in employee in response as depicted below:
To do this we’ll set a new route for the new version of the WebApi Version number in the URI, considering the most common way of versioning so we can consume a resource by callinghttp://localhost:57888/api/v1/Employees/FetchEmployeeById/1 (the client wants to use version 1 of the API) or http://localhost:57888/api/v2/employeesv2/FetchEmployeeById/1 (the client wants to use version 2 of the API).
To implement this we need to add two new routes inside the Register method in the “WebApiConfig” class as in the code below:
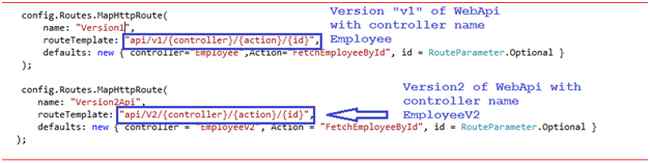
Notice in the code shown previously there are two new routes and mapped each route with its corresponding controller. In other words, the Route named “Version1? is by default mapped to the controller “Employees? and the Route named “Version2Api” is mapped to the Controller EmployeesV2.
Assume we want to add a new version, V3, of the existing WebApi. Then we need to add a new route to WebApiConfig.cs and so on.
Before proceeding I’d like to share how WebApi selects an appropriate controller from the current request. There is a class DefaultHttpControllerSelector that has the method SelectController, that method has the parameter HttpRequestMessage to maintain the information of route data including controller name defined in the class WebApiConfig. Based on this information it fetches the controller/classes collection using reflection derived from the ApiController base class.
The following is a code snippet for CustomControllerSelector:
Add “CustomControllerSelector” to WebApiConfig.cs to get its benefit as shown below:1: public class CustomControllerSelector : DefaultHttpControllerSelector2: {3: private HttpConfiguration _config;4: public CustomControllerSelector(HttpConfiguration config)5: : base(config)6: {7: _config = config;8: }9:10: public override HttpControllerDescriptor SelectController(HttpRequestMessage request)11: {12: try13: {14: var controllers = GetControllerMapping();15: var routeData = request.GetRouteData();16:17: var controllerName = routeData.Values["controller"].ToString();18:19: HttpControllerDescriptor controllerDescriptor;20:21: if (controllers.TryGetValue(controllerName, out controllerDescriptor))22: {23: return controllerDescriptor;24: }25: return null;26: }27: catch (Exception ex)28: {29: throw ex;30: }31:32: }33: }34:
- config.Services.Replace(typeof(IHttpControllerSelector), new CustomControllerSelector((config)));
Code snippet for Version v1
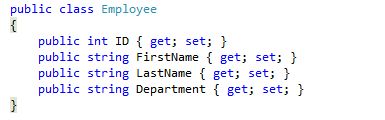
Kindly find the code below for the EmployeesController class and Employee Model class that represent version v1 of the WebApi as shown below:
To test this please press F5 and run you WebApi.1: public class EmployeesController : ApiController2: {3: public static IList<Employee> listEmp = new List<Employee>()4: {5: new Employee()6: {7: ID =001, FirstName="Sachin", LastName="Kalia"8: },9: new Employee()10: {11: ID =002, FirstName="Dhnanjay" ,LastName="Kumar"12: },13: new Employee()14: {15: ID =003, FirstName="Ravish", LastName="Sindhwani"16: },17: new Employee()18: {19: ID =004, FirstName="Rahul" ,LastName="Saxena"20: },21: };22:23: [AcceptVerbs("GET")]24: public Employee FetchEmployeeById(int id)25: {26: return listEmp.First(e => e.ID == id);27: }28: }29:30: public class Employee31: {32: public int ID { get; set; }33: public string FirstName { get; set; }34: public string LastName { get; set; }35:36: }37:
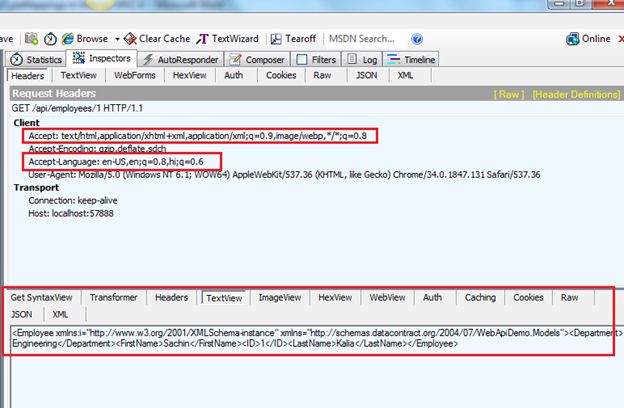
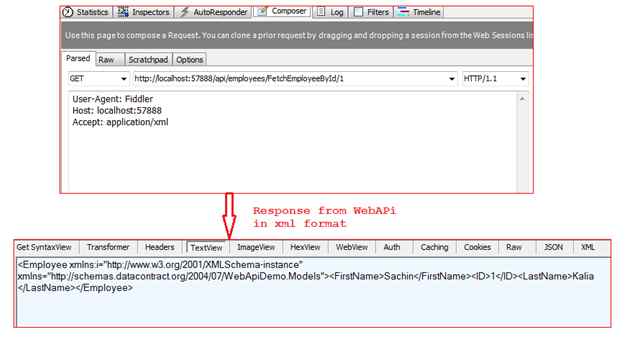
To test this we need to issue a GET request using the Web Proxy tool Fiddler as in the image below. Kindly copy and paste the following URL that specifies version v1:
http://localhost:57888/api/v1/Employees/FetchEmployeeById/1
Code snippet for Version v2
Kindly find the code below for the EmployeesV2Controller class and EmployeeV2 Model class that specifies version v2 of the WebApi:
1: public class EmployeesV2Controller : ApiController2: {3: public static IList<EmployeeV2> listEmp = new List<EmployeeV2>()4: {5: new EmployeeV2()6: {7: ID =001, FirstName="Sachin", LastName="Kalia",City="Noida",Gender="Male"8: },9: new EmployeeV2()10: {11: ID =002, FirstName="Dhnanjay" ,LastName="Kumar", City="Gurgaon",Gender="Male"12: },13: new EmployeeV2()14: {15: ID =003, FirstName="Ravish", LastName="Sindhwani", City="indianapolis",Gender="Male"16: },17: new EmployeeV2()18: {19: ID =004, FirstName="Neeraj", LastName="Arora", City="San Francisco",Gender="Male"20: },21: new EmployeeV2()22: {23: ID =005, FirstName="Rahul" ,LastName="Saxena", City="Hydrabad",Gender="Male"24: },25: new EmployeeV2()26: {27: ID =006, FirstName="Anshu" ,LastName="Agarwal", City="Noida",Gender="Female"28: },29:30: };31:32: [AcceptVerbs("GET")]33: public EmployeeV2 FetchEmployeeById(int id)34: {35: var coll = listEmp.FirstOrDefault(e => e.ID == id);36: return coll;37: }38: }39:40: public class EmployeeV241: {42: public int ID { get; set; }43: public string FirstName { get; set; }44: public string LastName { get; set; }45: public string City { get; set; }46: public string Gender { get; set; }47: }
Press F5 and run you WebApi.
To test this we need to issue a GET request using the Web Proxy tool Fiddler as in the image below. Kindly copy and paste the following URL that specifies version v2 into the Web Proxy tool Fiddler:
http://localhost:57888/api/v2/employeesv2/FetchEmployeeById/1.
Web API Versioning using QueryString parameter
WebApi versioning with query string parameter is a simple way to this, because everything is dependent on the query string parameter only.
We’ll specify the defined version of the WebApi in the request parameter. Using that parameter the SelectController class will identify which controller I need to call in order to respond to the client.
Added a new method into the existing CustomControllerSelector and made small amendments in the SelectController class as shown below in a code snippet.
1: public override HttpControllerDescriptor SelectController(HttpRequestMessage request)2: {3: try4: {5: var controllers = GetControllerMapping();6: var routeData = request.GetRouteData();7:8: var controllerName = routeData.Values["controller"].ToString();9: HttpControllerDescriptor controllerDescriptor;10:11: string versionNum= GetVersionFromQueryString(request);12:13: if (versionNum == "v1")14: {15: if (controllers.TryGetValue(controllerName, out controllerDescriptor))16: {17: return controllerDescriptor;18: }19: }20: else21: {22: controllerName= string.Concat(controllerName,"V2");23: if (controllers.TryGetValue(controllerName, out controllerDescriptor))24: {25: return controllerDescriptor;26: }27: }28:29: return null;30: }31: catch (Exception ex)32: {33: throw ex;34: }35: }36:37: /// <summary>38: /// Method to Get Query String Values from URL to get the version number39: /// </summary>40: /// <param name="request">HttpRequestMessage: Current Request made through Browser or Fiddler</param>41: /// <returns>Version Number</returns>42:43: private string GetVersionFromQueryString(HttpRequestMessage request)44: {45: var versionStr = HttpUtility.ParseQueryString(request.RequestUri.Query);46:47: if (versionStr[0] != null)48: {49: return versionStr[0];50: }51: return "V1";52: }
Press F5 and run you WebApi.
Kindly paste the following URL into Fiddler to verify the working behavior.
http://localhost:57888/api/employees/FetchEmployeeById/2?V2
Kindly have a look at the image shown below:

In the same way you can try with:
http://localhost:57888/api/employees/FetchEmployeeById/1?V1
Web API Versioning using Custom Header parameter
So far we’ve seen WebApi with the two techniques URL and Query String. The next WebApi versioning techniques with CustomHeader parameter is an easy way to do versioning. For this example we’ve used customHeader Name “Version-Num” that we must send into the current request.
We’ll specify the desired version of the WebApi in the CustomHeader request. Using that parameter the SelectController class will identify the controller I need to call in order to respond to the client.
Added a new method into the existing CustomControllerSelector and made small amendments in the SelectController class as shown below in a code snippet.
To test this we need to issue a GET request using Fiddler as in the image below, note how we added the new header “Version-Num” to the request header collection.1: /// <summary>2: /// Method to Get Header Values.3: /// </summary>4: /// <param name="request">HttpRequestMessage: Current Request made through Browser or Fiddler5: </param>6: /// <returns>Version Number</returns>7: private string GetVersionFromHeader(HttpRequestMessage request)8: {9: const string HEADER_NAME = "Version-Num";10:11: if (request.Headers.Contains(HEADER_NAME))12: {13: var versionHeader = request.Headers.GetValues(HEADER_NAME).FirstOrDefault();14: if (versionHeader != null)15: {16: return versionHeader;17: }18: }19:20: return "V1";21: }
Web API Versioning using Accept Header parameterSo far we’ve seen WebApi with the three techniques URL, Query String and CustomHeader.
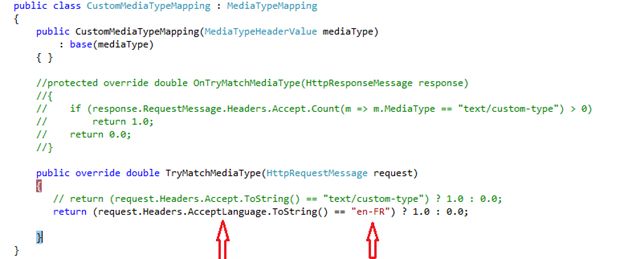
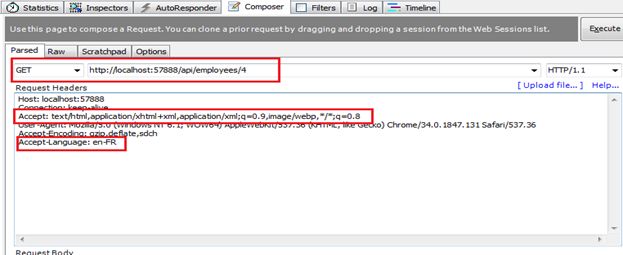
The next WebApi versioning technique uses an AcceptHeader parameter that is an easy way to do WebApi versioning. For this example we’ve used an Accept Header value Accept: application/json or "Accept: application/xml, that we need to send into the current request.
For this approach we’ve added a new method in the existing CustomControllerSelector and made small amendments in the SelectController class as shown below in a code snippet.
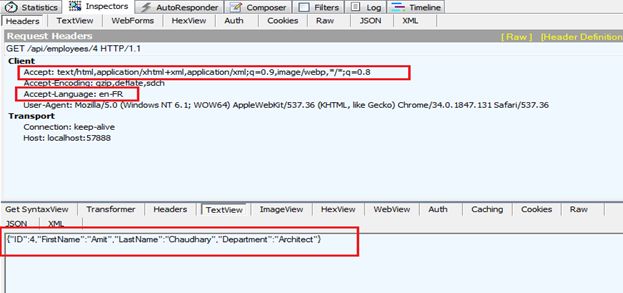
Note: We are assuming that if the end-user/client doesn’t provide a value then we will consider it to be Version V1. Kindly have a look at the image shown below:1: /// <summary>2: /// Method to Get Accept Header Values.3: /// </summary>4: /// <param name="request">HttpRequestMessage: Current Request made through Browser or Fiddler</param>5: /// <returns>Version Number</returns>6: private string GetVersionFromAcceptHeader(HttpRequestMessage request)7: {8: var acceptHeader = request.Headers.Accept;9:10: foreach (var mime in acceptHeader)11: {12: if (mime.MediaType == "application/json")13: {14: return "V2";15: }16: else if (mime.MediaType == "application/xml")17: {18: return "V1";19: }20: else { return "V1"; }21:22: }23: return "V1";24: }
Now if we replace Accept: application/xml with application/json then it should respond from WebApi version V2. Kindly have a look at the image shown below:
You can also get more details about the Media Types formatter using the link shown below:
Note: It might be one of the questions in an interview.
Download source code from here : Demystify Web API Versioning- Source Code